Sign in, claim 150 free credits, complete your profile, and tour the dashboard tabs.
2 · Getting started
Creating an account
Go to sci-database.com and click Go to Dashboard (or Start free). You'll land on the login page:
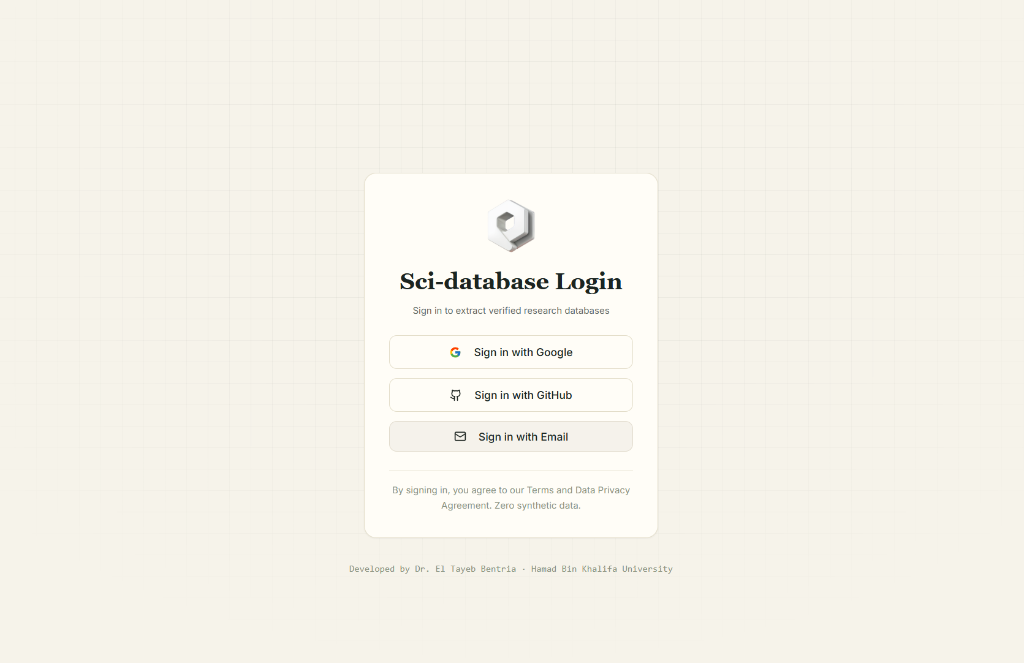
Three sign-in options are available:
- Sign in with Google — one click with your Google account.
- Sign in with GitHub — one click with your GitHub account.
- Sign in with Email — opens the Email Login dialog. If you don't have an account yet, click "Don't have an account? Register here" and fill in your full name, email, and a password (6+ alphanumeric characters).
Tip for university users: you can register with your institutional email — an academic discount is available for students and postdocs.
First sign-in
- You receive 100 free credits immediately (1 credit = 1 paper extracted), plus a welcome email.
- A Terms and Conditions dialog appears. Read it — the key points:
- Your extracted data and papers stay private to your account.
- The schema you design (field names and descriptions only) may be made public in the schema gallery to help other researchers.
- Click "I have read and agree to the Terms" to continue.
- You land on the Dashboard.
Get 50 extra credits — complete your profile
A banner titled "Get 50 Extra Credits!" invites you to complete your profile: full name, age, country, university/institution, and field of research. Click Save and Get 50 Credits — this brings a fresh account to 150 free credits ≈ 150 papers, the free tier advertised on the landing page.
You can earn another +50 credits (once per account) by sharing Sci-database on social media — see Credits & pricing.
The Dashboard
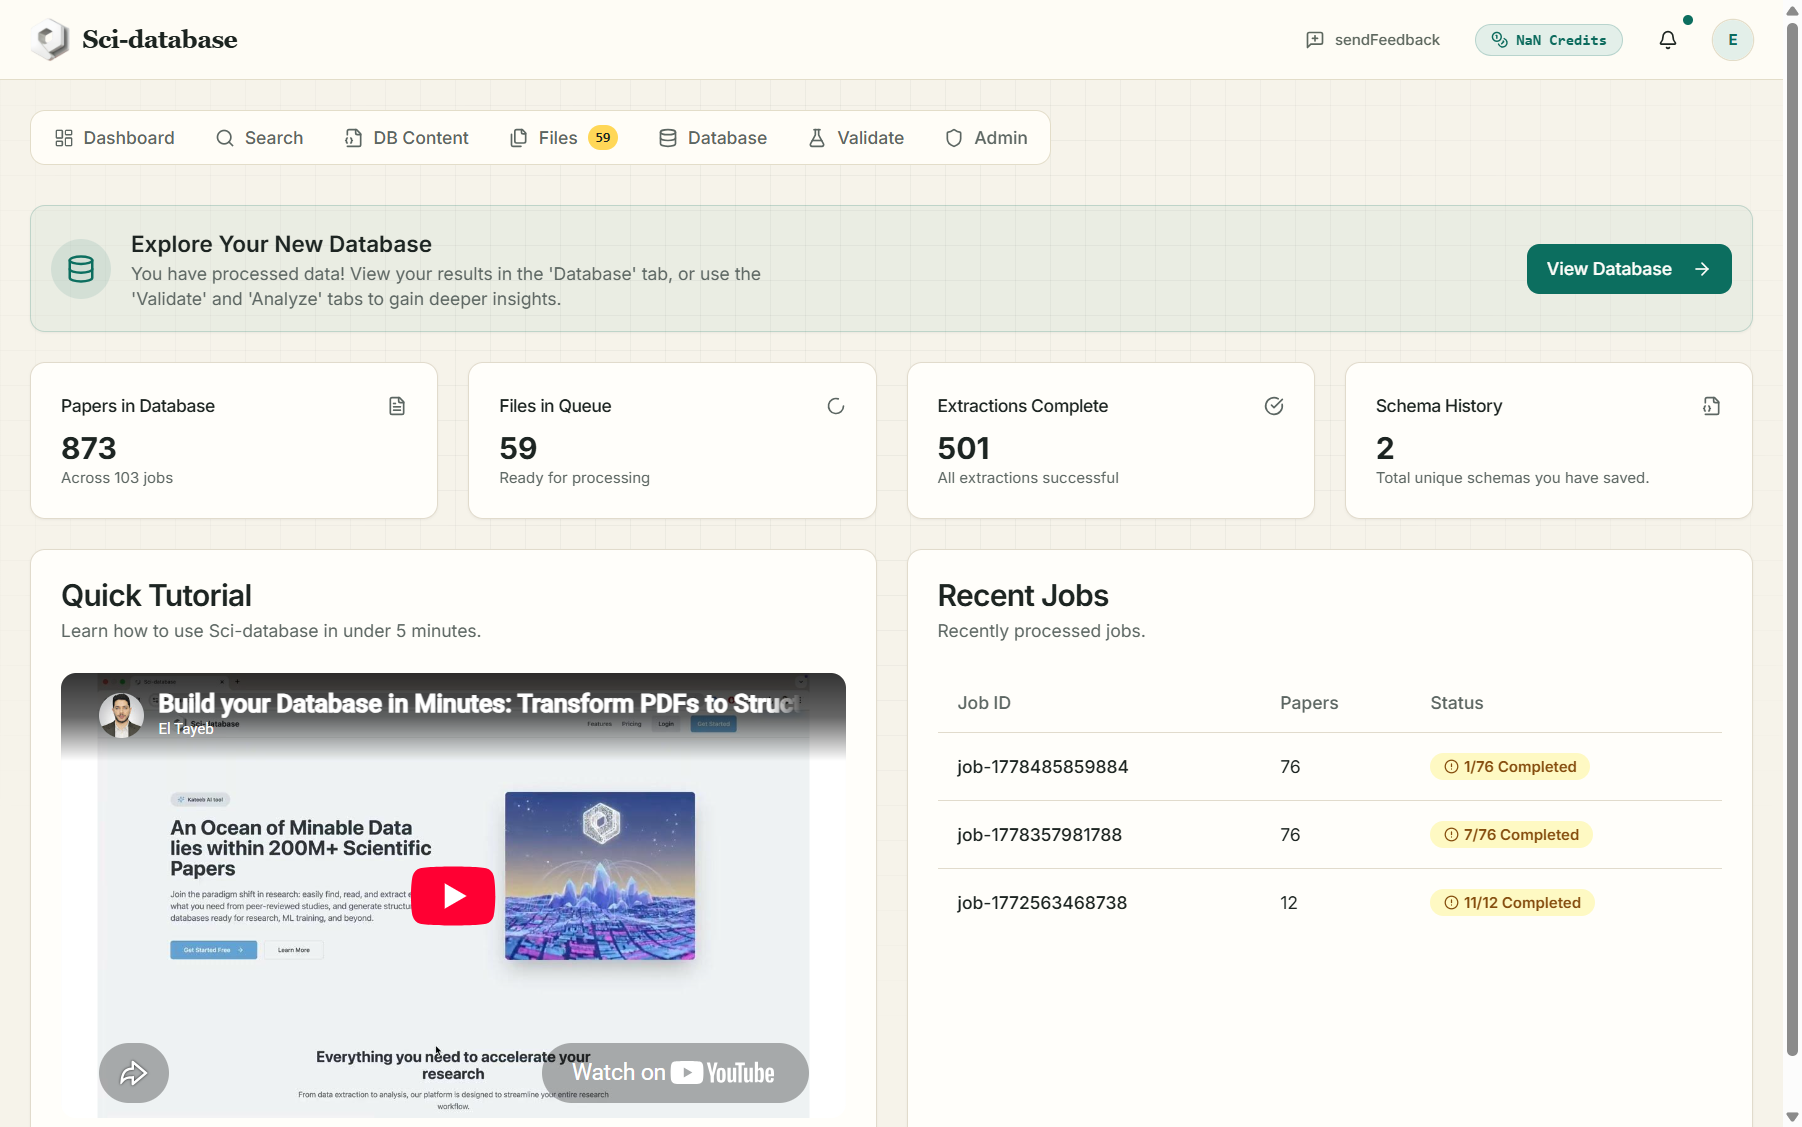
The header shows (left to right): the Send Feedback button, your credit balance, the notifications bell, and your avatar menu (Account Details, Buy More Credits, Get More Free Credits, Dark Mode toggle, Log out).
The main area has one tab per step of the workflow:
| Tab | What it does |
|---|---|
| Dashboard | Overview: stat cards, a "next step" guide, recent jobs, and a 5-minute video tutorial |
| Search | Find papers in public repositories and queue them |
| DB Content | Define the schema — the fields your database will contain |
| Files | Your paper queue: verification status, PDF uploads, and the button that starts extraction |
| Database | All your extraction jobs and their results; export lives here |
| Validate | Cross-check a completed job with a second AI model |
The "Next step" card at the top of the Dashboard tab always tells you what to do next — from "Start Your First Project" on a fresh account, through "Define Your Data Schema" and "Process Your Files", to "Explore Your New Database".
A Quick Tutorial video (under 5 minutes) is embedded right on the Dashboard tab if you prefer watching to reading.
Next: Searching for papers →